Translate

Monday, 7 September 2015

Tea Bag Holder for Memory Maze

Well I'm back after my long break with my first post for the month for Memory Maze.


Tea Bag Holder

To begin to make this 3 section Tea Bag Holder you will need to cut each of the pieces out of chipboard sheets. I have included all of the details in the first few pictures for you. The measurements are all in millimeters (mm).

One Back Panel (154mm * 200mm), Three Inside Back Panels (160mm * 50mm each) and Three Ramp Supports (38mm * 50mm each)
One Outside Lid piece (80mm * 170mm), Two Inside Lid pieces (68mm * 152mm each), One Base section (103mm * 160mm) and a Front Plate piece (30mm * 156mm).
Three Ramp sections (50mm * 71mm each), Two Inside Panels (120mm * 197mm each) and you will need Six Inside Ramp Pieces (the triangular sections seen in the right lower corner of this picture) (58mm * 38mm each). One of these Inside Ramp Pieces gets stuck to both sides of the Inside Panels.
 
One Outside Front Panel (154mm * 177mm) and Three Front Inside Panels (50mm * 177mm each). NOTE: I did end up increasing the size of the cut-out windows to about 36mm wide and 20mm high for the Three Front Inside Panels.
 
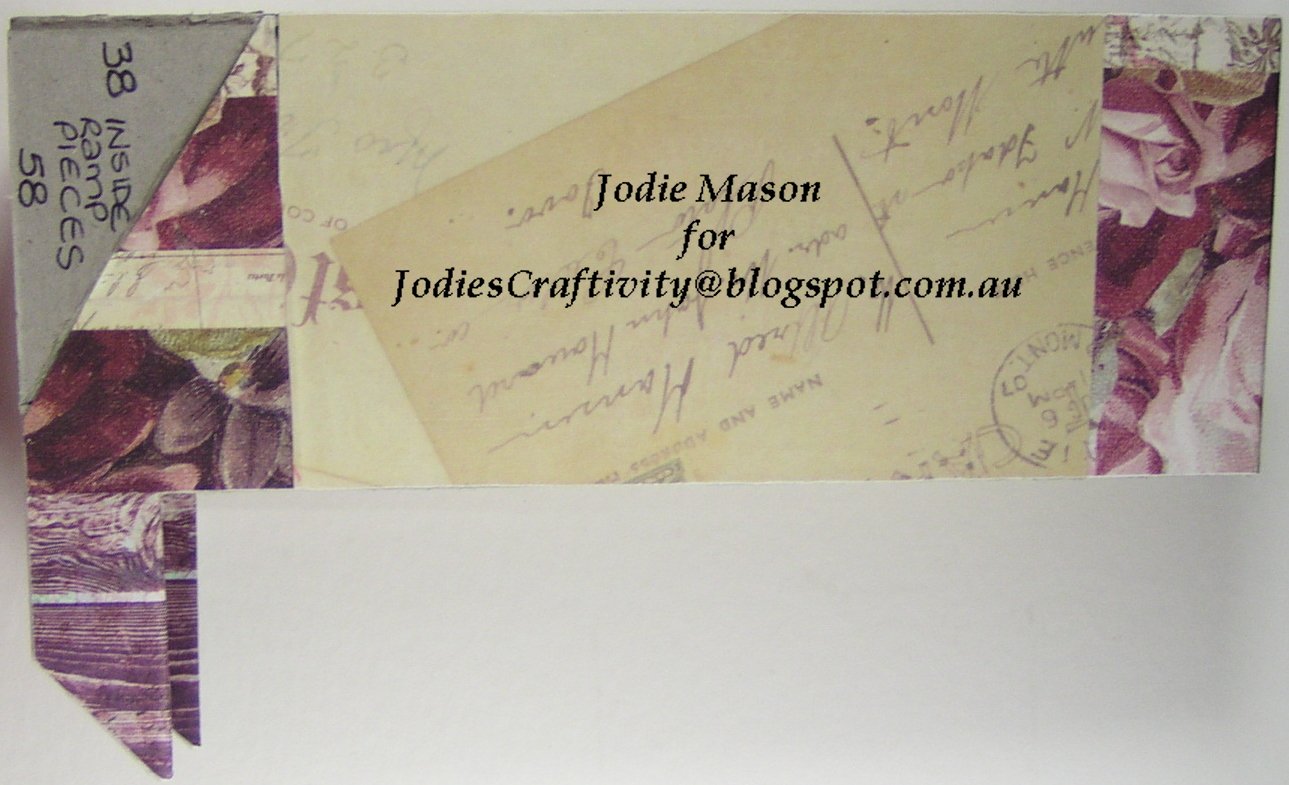
Two Outside Side Panels (200mm * 123mm) and Two Inside Side Panels (118mm * 197mm). The Two remaining Inside Ramp Pieces get stuck to the inside of the Two Outside Side Panel pieces as shown on the far left.

Please keep in mind that some of these measurements may need to be tweaked slightly depending on the width of the chipboard that you are using. I have also used some leftover pieces of paper that I had remaining from another creation. The few larger pieces that I had have been used to cover the main (outside) pieces, with scraps used to cover the other pieces. All papers were stuck to the chipboard using Gel Medium and then once stuck down had another 2 coats of it applied over the top to seal it.
 
Let's break it down into sections to make it easier to work with.
 
The inside back section: 
I began with the 3 inside back panel pieces. The papers for these were the same width, but slightly longer than (by about 20mm) the chipboard pieces as can be seen in the following pictures.
 
TIP: I actually cut all of my papers a little bit bigger than the pieces and once they are stuck down and dry either cut or file down the unwanted excess. This way your chipboard pieces are always covered completely.
 
Inside Back Panel pieces (inside section)
Inside Back Panel pieces (outside section). The overhang has been stuck down at the top.
 
The base and outside back section:
 
The Back Panel and Base Panel with markings to show where the inside pieces will sit. I have also marked in dotted lines the placement for the beads which I used as feet. For the feet I came in 10mm from all sides and then divided the remaining space by the number of feet you have.

 Start by sticking your paper onto the Back Panel making sure to have some overhang on each side with the most at the top. Cut the corners out of the top overhang so that the paper is in line with the edges of the chipboard. Fold the top over to the inside and stick it down. Place a bead of glue along the bottom of the Back Panel and stick this to the back of the Base Panel. I have used a few pieces of double sided tape to keep it in place while it dries. Stick the overhang from the Back Panel to the underside of the Base Piece. Stick the paper to the Base Panel leaving about 10mm on the front and both sides unstuck. Make sure that you have excess paper on both sides, but any excess on the front or back can be removed. You can also glue down the two outside Ramp Support pieces into position on the Back Panel.
 

An outside view of the Back Panel attached to the Base.

I have pocked holes through the Base where the feet were to go and slipped jewellery headpins through the pearls and the holes to the inside of the Tea Bag Holder. The ends of the headpins were bent to lay flush with the Base and glued in place with some Glossy Accents.
 

For feet I used some large pearl beads and headpins.

The back lots of headpins can lay to the sides as this area will be hidden under the Ramp Sections. 

The inside view of the headpins holding the feet in place.

 With the front lot of headpins I have stuck these down fairly straight as only paper will cover these.
 

The inside view with all of the headpins stuck down in place. I have used some double sided tape to hold them in place while the Glossy Accents dried.

 
The inside section:
 
These have been covered in paper on both sides, with the papers folded over the sections that will be showing at the top. It is not necessary to cover the areas where the Ramp Supports are.
 

Side view of the covered Inside Panel.

Once the Two Inside Panels have been covered you can glue the remaining Ramp Support between them at the back. TIP: You may want to use a scrap piece of chipboard cut to the same size as the ramp support and place this between the two panels at the front. This will enable you to put an elastic band around them to keep them in place while the glue dries.


 For the Inside Base Section you will need a piece of paper that measures at least 185mm * 165mm. On the reverse side of this I have worked out the placement for all of the pieces (as can be seen in the following picture). Allow at least 75mm for the 3 Ramp pieces, 40mm for the Base piece, 2 lots of 31mm for the Front Panel and the extra gets glued down under the paper covering the Base. For the width you will need 154mm with some overhang available on both sides. Stick down the 3 Ramp Sections and the Front Panel piece as shown in the picture. Remove the excess paper from between the Ramp Sections and fold over and stick down the excess. Trim the excess that will be stuck under the paper at the base to 154mm. Fold the excess on both sides of the Front Panel over and stick down.
 
The placement of chipboard pieces on the Inside Base paper.
 
The Inside Base paper from the other side.
 This Inside Base Section can then be glued to the Inside Panels firstly by gluing the Ramp Sections to the Inside Ramp pieces. I have once again used double sided tape to hold these in place while the glue dries.
 

A side view of the Inside Sections joined together.


The rear view of the Inside Section.


Another view of the Inside Section.
The Front Panel can now be tucked under and glued to the other section of paper, so that both sides of the panel are covered.
 

Now to join the base/back sections and the inside sections:
 
To join these sections put glue along the back of the Inside Panels and slide the Inside Section onto the Base/ Back Section so that it fits between the 2 outside Ramp Support pieces. Glue the central Inside Back Panel into place. Glue the top of the Ramps to the Ramp Support Sections attached to the Back Panel. Put some glue over the Base where the paper will be sitting and glue the base of the Front Panel to the Base Section. Stick the excess paper under that of the Base Section and stick this down. Glue down the other 2 Inside Back Panels.
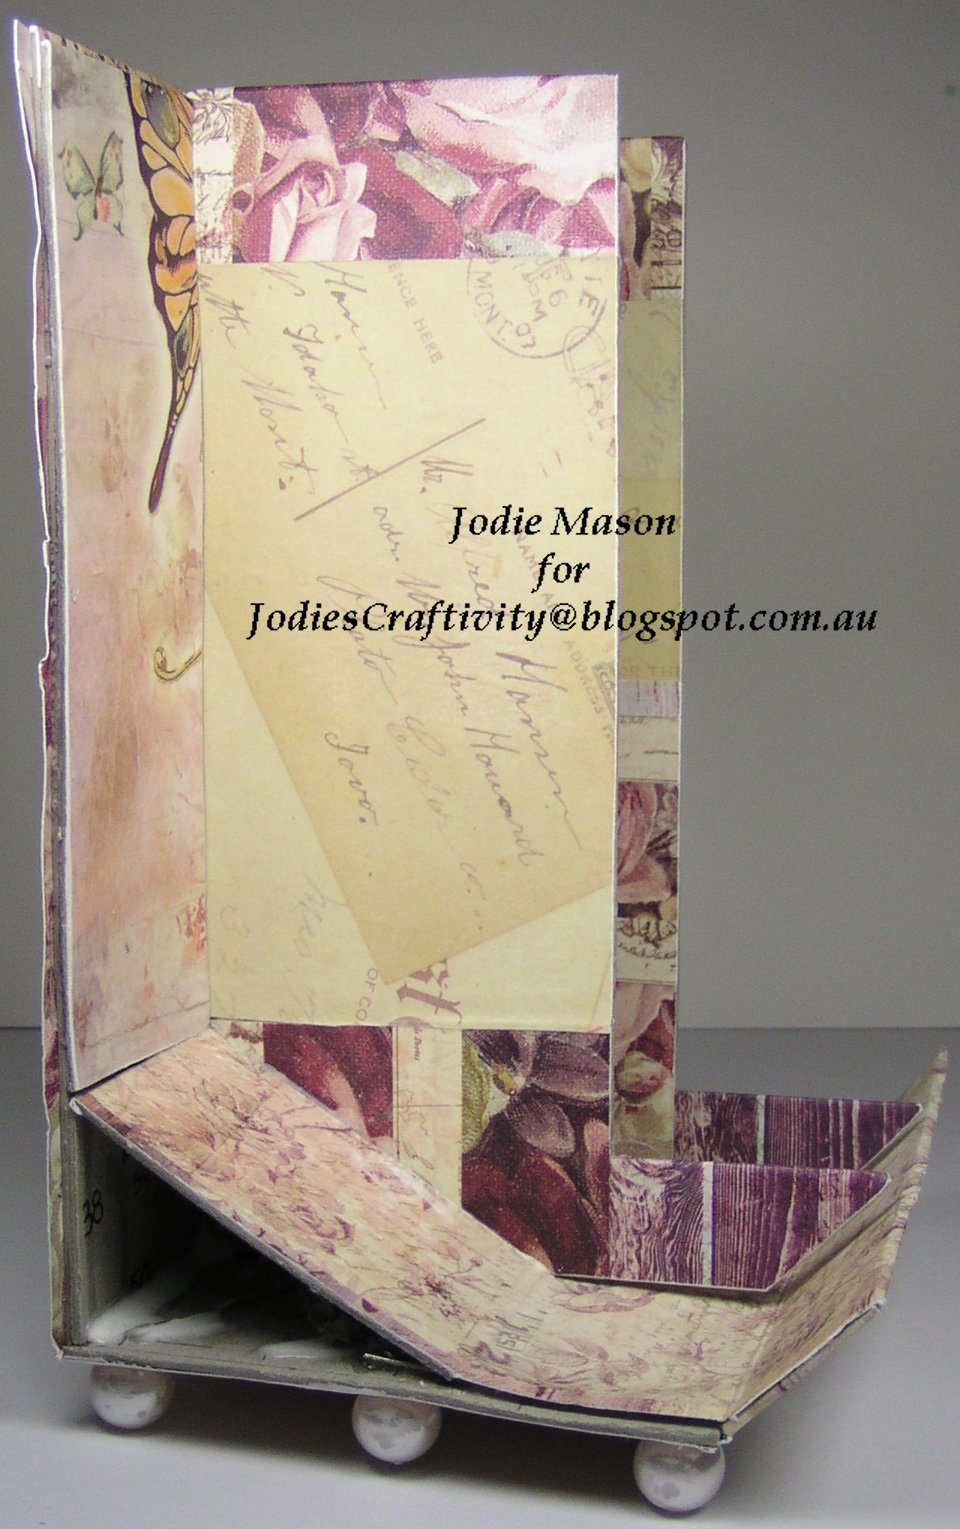
 
The Base/ Back Section and Inside Sections joined.

View of the joined sections from the other side.
 
Top view of the joined sections.
 
Frontal view of the joined sections
 Place a bead of glue to the underside of the Inside Panel pieces and stick these to the Base and Front Panel pieces.
 
Side view of the completed Inside Section.
 
Other side of the completed Inside and Base/ Back Sections.
 
The outside side sections:
 
These need to be prepared in a similar manner to that of the Inside Panels. Paper should be stuck down to the inside of the Inside Side Panels and folded over at the tops (this includes the tray section). The remaining edges can have excess paper removed. Prepare the Outside Side Panels in the same way only you need to have a small excess at the base (this needs to be stuck under the paper covering the Base piece). The Inside Side Panels can be glued into place (along the base and back edges) of these panels. With glue along the same edges on the Outside Side Panels and also on the inside where the Inside Side Panels will stick to them, stick these down also.
 
TIP: I used clothes pegs, rubber bands and spare chipboard pieces to hold these sections in place while the glue dried.
 
A side view of the sections so far stuck together.
 
Alternate view of the sections so far.
 
Frontal view of the sections so far.
 
Now for the front section:
 
The paper for the Outside Front Panel needs to be about 25mm longer and about 20mm wider than the chipboard panel. Stick this to the panel and make cuts to the paper as seen in the pictures so that it can be folded over and stuck down.
 
Frontal view of the Outside Front Panel.
 
Back view of the Outside Front Panel
 I have used small pieces of acetate to cover the window panels, and have folded and stuck down the top and bottom excess papers. For the Inside Front Panels the paper should be about 10mm longer than the chipboard and the overhang folded over at the top.
 
The 3 Inside Front Panels.

The other side of the 3 Inside Front Panels.
These then need to be glued together.
 
The Front Panels glued together.
 
Now for the lid:
 
The 2 inside chipboard pieces were stuck together and paper wrapped around them. The Outside Lid piece was prepared in the same way with paper wrapped around it. These were then all glued together.
 
The Outside Lid piece.

The Lid pieces stuck together leaving a small gap at the back and a larger section at the front.
The completed and decorated project:
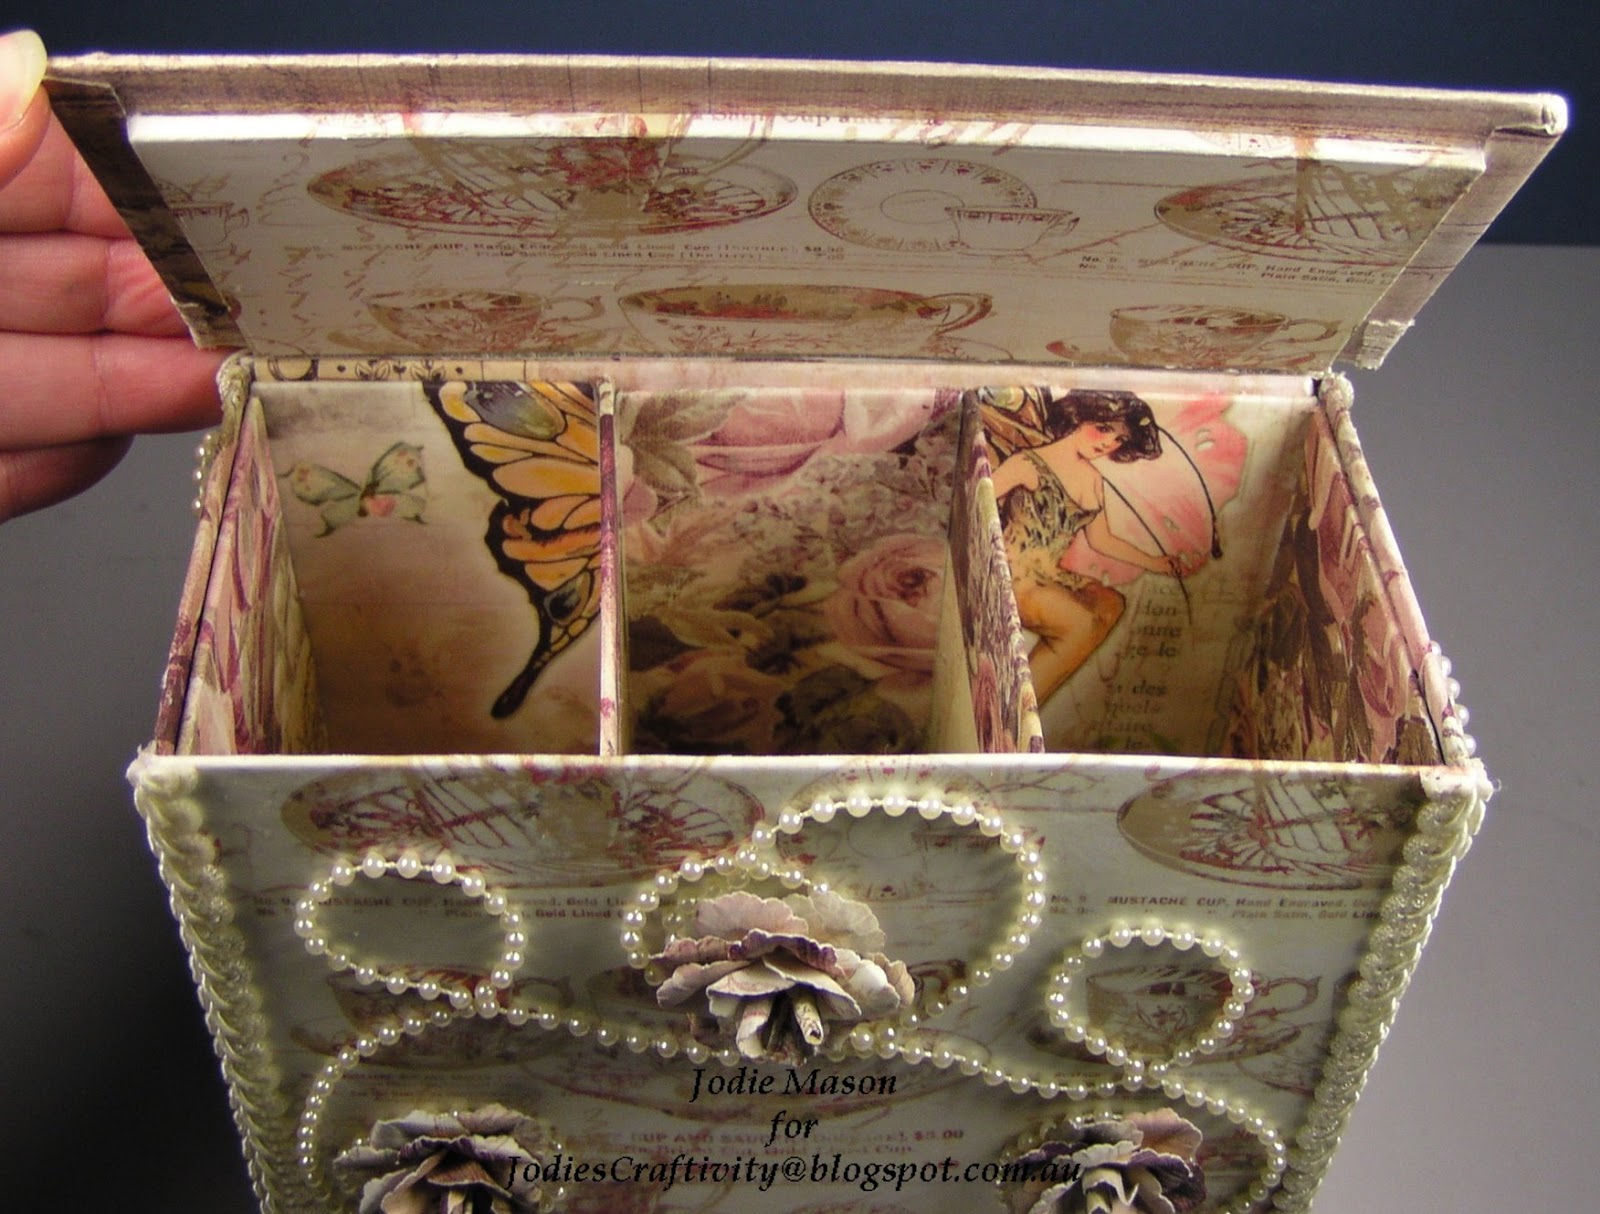
The Inside:


The Lid:


The Front:


The Back:
 
 
And The Sides:


Wow, that was a long post. Hopefully it wasn't too much for you and it was easy to follow along. I'd love to hear your thoughts on this creation/design and even better yet share your pictures if you do make one for yourself.
 
Until next time,
 
Keep Creating,
 
Jodie Mason.

Monday, 15 June 2015

You're my princess canvas for Memory Maze

Hi all. I hope this finds you all well. It has been hectic here for me. Seriously, who knew that cleaning out and resorting craft supplies could be so much work? Lol! It's taken me a full week so far, and I'm still only half way there. I did however manage to find a few hidden gems, that I had obviously put away in a safe place for later use. Am I the only one that does that?

Princess Canvas
 
This all started out with an idea I got from a crafting group on Facebook recently. They were making little fairies and using flat paper flowers for their skirts. I loved the thought and had the perfect piece of chipboard to work with. I began by sketching a bit of a bodice on the chipboard. The bodice was painted with pink acrylic paint and the remainder with black acrylic paint. I cut some large paper flowers in half and then took an extra one or two petals off the edges. These were layered over the stand to create the skirt. As I got to the top of the skirt I changed from large flowers to medium sized ones, that had been prepared in the same manner. The final 2 or 3 layers were made up of single petals cut from the medium flowers. The petals that were cut from the flowers used, were then slotted in among the skirt to create a little more fullness. The bodice was created by covering the pink paint with white craft glue. Some pink rhinestone flowers were put in place and some small white seed beads sprinkled over the remainder of the glue.
 
The plaque was die cut from a sheet of chipboard. I've added some liquid pearls to the outside flourishes to add some more dimension. Once this had dried it was covered in 2 coats of gesso followed by some metallic silver acrylic paint. While this was drying I printed out the sentiment on some scrap cardstock. This was cut out and stuck to the plaque. The plaque piece was covered in Emboss-it glue (except where the sentiment is), and this was covered in metallic silver embossing powder. I then covered the sentiment section in a coat of glossy accents.
 
 
With the chipboard components for my canvas done, I was able to turn my attention to the canvas itself.
 
I started with a 20cm * 25cm blank canvas. This was painted with some pink acrylic paint. I used gel medium to stick some paper accents onto the canvas to supply some more texture (this included 2 border die cuts, 2 love sentiment die cuts and some small ripped pieces of scrap cardstock). I then added some modelling paste through two different stencils to sections of the canvas, and dried it with my heat gun. A pink gesso wash was applied over the top of everything (to do this I just used the brush that I used to apply the pink acrylic paint earlier, and added some water to the gesso). Next was the messy (but oh so much fun) part. I sprayed the canvas with some Perfect Pearls Mists in pink gumball and then applied a few drops of Adirondack Alcohol Ink in cranberry. Some more Perfect Pearls Mists (in grape fizz this time) was sprayed and then some Pearl Ex powder (in true blue) was sprinkled over the top and another few spritz' of pink gumball. Then it was time to let it dry (or speed this up with a heat gun). Once it was dry more of the same sprays were added with the addition of some Tattered Angels Glimmer Mist in riptide to add a little more contrast to the dress colour. Once again this was dried.


Some white craft glue was used to stick the additional die cuts down (being the white lace, dress and love sentiment).  Some white/ivory flowers from my stash were sprayed with the same mists and then dried. The mannequin was attached to the canvas using 3D foam squares, and the chipboard plaque and flowers were also stuck down with craft glue.
And here it is completed.


So what do you think? Maybe you too could give this a try.
 
Until next time,
 
Keep Creating,
 
Jodie

Sunday, 24 May 2015

Wedding Album How To

As promised in yesterdays post, here are some step-by-step instructions so that you to can make your own albums.

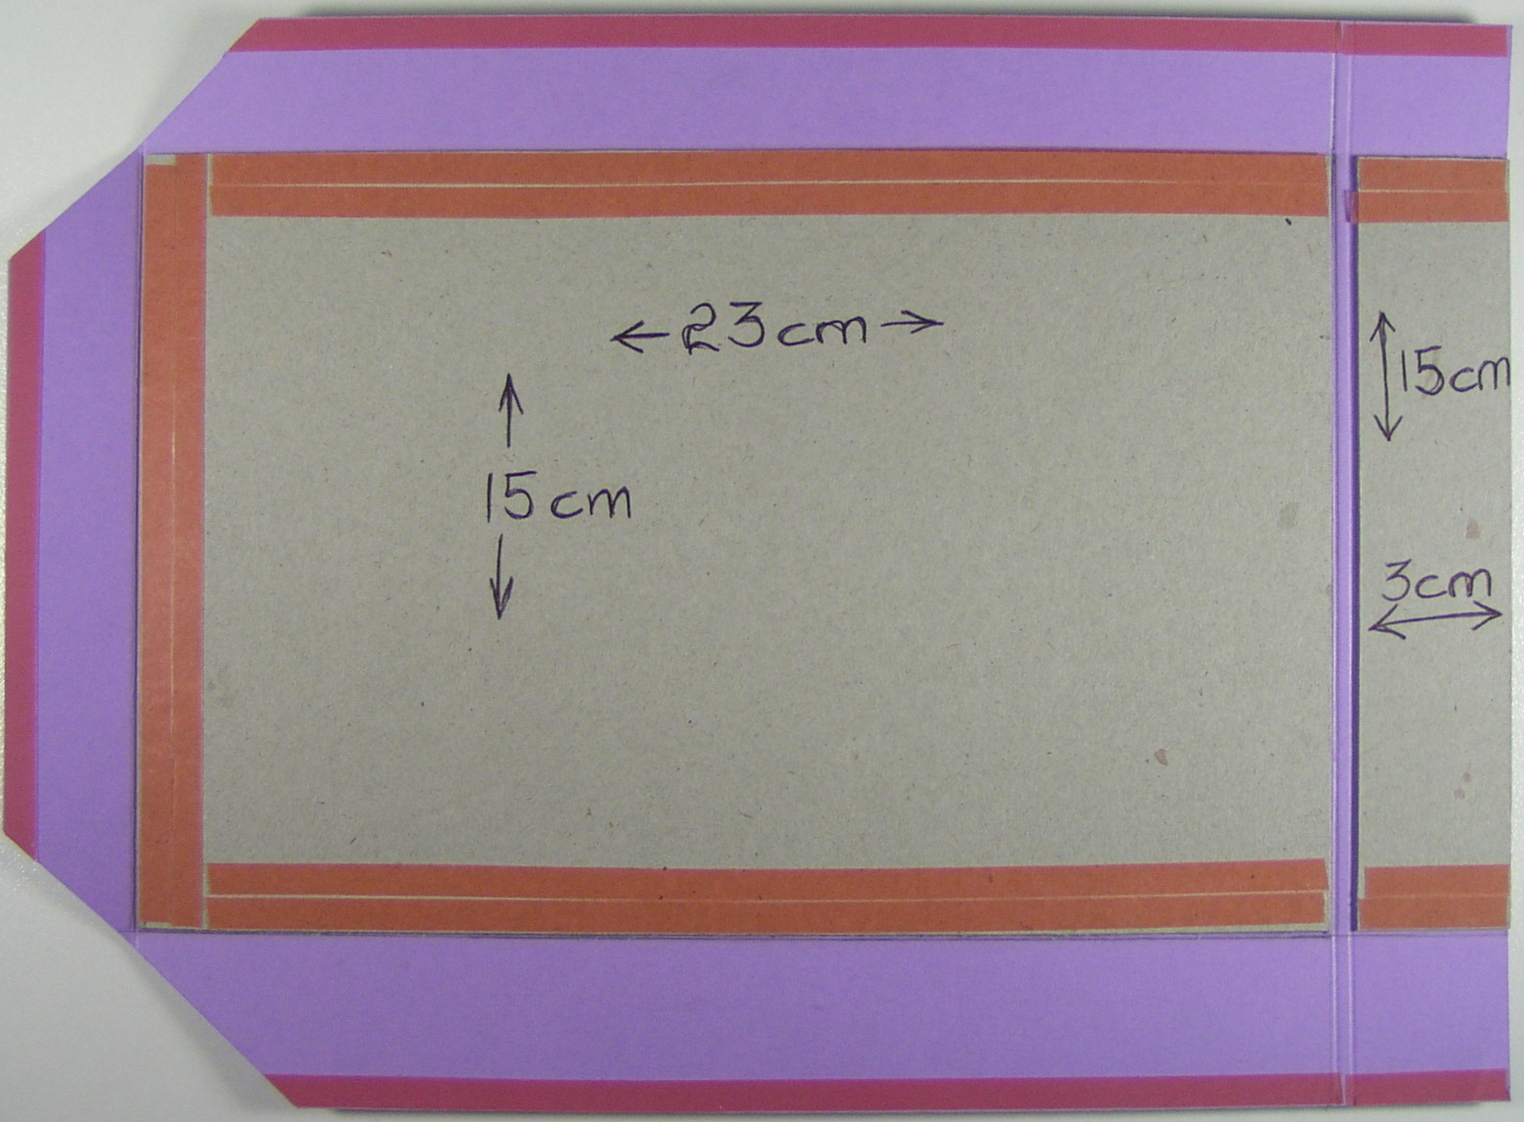
To begin with I have cut down a piece of chipboard sheet (that was 30cm * 30cm) so that I had 2 pieces that were 15cm * 23cm and another piece that was 3cm * 15cm. Next you will need 2 pieces of A4 cardstock. I have scored both of these along a short and long side at 1". Next place your 15cm * 23cm chipboard piece on the cardstock, lining it up with the score lines. With a pencil mark where the chipboard edges are on the opposite sides. Score along these lines also. Make an additional score line on the short side that is 1/4" out from the last. Stick down the large chipboard pieces so that they are inside the scored lines of the cardstock. On one of the pieces of cardstock also stick down the small chipboard piece (aligning it with the score lines). Add tape (like in the below pictures), and your 2 pieces of album cover should look like these next pictures.


 Next you will need to trim the cardstock off in line with the edge of the small chipboard piece. You will also need to trim the 2 corners off, but make sure to leave a little space between the edge and the cut line so as to cover the thickness of the chipboard. Tape has also been added to the spine piece of chipboard and cardstock (as in the next picture).
 
 
With  the other piece you will need to cut the corners off in the same manner as before. You will also need to trim about 1cm from the other short side. Your piece should look like this.

 
 Remove the tape from the short side of the chipboard and cardstock, and using a bone folder fold the cardstock over and stick it down. Now do the same for the long sides, but before you stick them down use your bone folder to tuck the corners in so that you have a neat finish. I have gently pushed my bone folder in between the two chipboard pieces to help them fold easily. Your first piece should now look like this.
 
 
Using the same process as before do the short side of the other piece. Now you will need to add some tape/glue to the other short side. Carefully line up your first piece with this piece and stick them together. Then continue to fold and stick down the long sides. Your cover should now resemble this.


Now it's time to start decorating your outside cover. For mine I started by using glue to stick some lace down.

 
I cut down a piece of matching material and used this on the back cover.
 
 
Another piece of the material was cut down to 11.5cm * 23cm and was stuck to a piece of the cardstock for additional support. A layer of chipboard was added underneath it (9.5cm * 20.5cm). This was then stuck to the front of the album cover.
 
 
Another two pieces of cardstock were cut down to 14.5cm * 25cm and scored at 23cm. These were then stuck to the inside of the album as seen in the next pictures.


To finish it off the rings and binding were added to the spine, and embellishments added to the front cover.


So what do you think? Think you might give it a go?
 
Until next time,
 
Thanks for joining me.
 
Jodie

Friday, 22 May 2015

Wedding Album and Quick Birthday Card for Memory Maze

Hi all. I hope this post finds you all well. Things are busy as usual here, but let's face it when are things not! This time around I have made some items for my in-laws. Fingers crossed they like them. Feel free to leave me a comment and let me know what you think of them.

Wedding Album

The first was a request from my sister-in-law as she has a heap of their wedding photos that are 5" × 7", that are just stored in a box at present (and have been for over a decade)! So the brief was to create something to store the pictures in that would also protect the photos and allow them to be accessed when needed. She knew that the old style of album sleeves weren't any good for your pictures (because of the acid in the glue that allowed you to stick the photos in place), but liked the idea of some type of plastic sleeves to store the photos so that they could be pulled out easily if needed. After assuring her that the majority of plastic sleeves out there these days were acid free and archival quality, she agreed to leave it in my hands. Very trusting, isn't she!

So I put on my thinking cap and decided to make my own albums for her. I grabbed some project life plastic sleeves in 5" × 7" for her pictures and the rest was up to me. I've cut down some chipboard sheets to create the album covers and covered these in paper, material, lace and binding.
 
 
I've used some chipboard wedding themed words to help decorate the front cover. These have all been prepared by spraying with Perfect Pearls Mist (grape fizz) to begin with. The title Wedding word has then been coated in several coats of Zing embossing powder (lavender opaque finish). The remaining words were then stamped with a glue pad and have had Pearl Ex powder in misty lavender (688) lightly brushed over the top, before having a layer of Glossy Accents applied.

To complete the album I've just covered the inside of the album and added some metal rings to hold the plastic sleeves in place. Hey presto! Job done.
 
 Quick and Easy Birthday Card
 
In addition to the wedding album I also have a quick, super easy birthday card for you today. It is for my nephew who will be 11 soon. He loves his motorbike, so I thought the Heel Click chippie would be fitting. I have coloured it in with a black watercolour pencil. I used a cogs stamp to stamp embossing ink over it and covered it with white embossing powder. Once heated it gave a pretty cool effect (even if I do say so myself). The same cogs stamp was then used in the background in addition to a happy birthday sentiment.
 
 
That's it for me for now, but if you come along again tomorrow I will have a tutorial on how I made the wedding album. If you like any of the chippies used for this post please contact Memory Maze. 
Hopefully I'll see you again tomorrow,
 
Jodie Mason
 

Wednesday, 13 May 2015

May's Card post for Stick It Down

I hope this post finds you all well. Here in Queensland, Australia, the weather outside is starting to get quite chilly, and along with the storms we've had lately is providing the perfect atmosphere to stay inside and get crafty. Now as those of you that follow my blog know by now, with a new month brings a new set of challenges over at Stick It Down. Being on the card team this picture was the challenge before me.


I had just received a new set of dies from my favourite local supplier (yes Shelley I'm talking about you) (and for those of you that would like to check her collection out you can do so here), and they were the perfect size to put on a guys card. Now I don't know about you, but all of the guys in my life know their way around a tool belt or two, if you get what I'm saying. I mean it might be dangerous to let me loose in a craft store with a wallet full of cash, but my hubby is just as dangerous in a hardware store, if not more so! Anyway, I flicked through my pile of scrap paper and found some great colours to go on a guys card, and this was what I ended up with.


Something nice, simple and understated. What do you think? Now Stick It Down don't only provide card challenges, they also have single and double page scrapbooking challenges too. So why not pop on over and check them out.

Until next time,

keep creating,

Jodie.